
Apart from that, I'm getting into the christmas spirit and today I have an easy card for you which you could easily mass produce! Yes, I said the magic phrase: mass produce! Let's take a look, shall we?

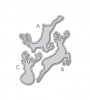
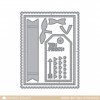
I started out by die cutting a piece of sturdy white card stock so it would have a stitched frame. You can totally skip this, but I like the little extra that gives my cards. Then I die cut one of the stag from the Wplus9 die set directly from this card front – you can save that piece for other projects.
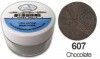
Thanks to the glitter by Elizabeth Craft Designs I can make my own glitter paper in any color I like. I covered the same type of paper that I had used for my front panel with a piece of double sided adhesive, poured glitter onto it, and voila - glitter paper! Once you rub the glitter, it doesn't come off, so you can die cut through it without any problems. It's important to use the same paper for this as for your front panel because we are doing inlay die-cutting and you need the same thickness of paper.

You could of course just mount the deer on top of the panel, but have you ever seen people get a card that they know is handmade and then try to figure out "how you did that"? It's hilarious, and inlay-die cutting is something that looks awesome, and will certainly be admired by the recipient (yes, I am vain like that).
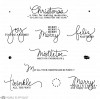
The sentiment was stamped with brown pigment ink and I used my Letterpress as a stamp positioner again. Sometimes, I don't get a good first impression with my pigment inks and I don't want to line up a complex sentiment stamp like this by hand. As you can see here, my first attempt wasn't perfect, but thanks to the Letterpress I was able to stamp in the exact same position again. Awesome!

To add some color to the card, I added a ribbon (not my best bow, sorry) and some sequins and gems. I wanted to keep this card simple and elegant, and I love the unusual color combo for the season.
I hope you enjoyed this tutorial! Thanks for stopping by today!


2 comments:
I love everything about this card xx
Gorgeous card! xxx
Post a Comment